Pre-Requisites
Exchange Online (EXO) Service Admin Access
How to get Exchange Online Service Admin Access?
- You will have to reach out to your Tenant’s Global Admin and request him to grant you access
- Login to Microsoft 365 Admin Portal
- Expand the Users section and click on Active Users
- Search for the user who needs to be granted EXO Service Admin role and click on the user’s Display name
- You will be presented with the user details panel
- On the Accounts tab, you will see a section called Roles
- Clicking on Manage Roles option will present the Manage admin roles panel
- Click the Admin center access radio button and then select Exchange Administrator option
- Click Save changes button
The user will have to log out and log back in again so that the role change becomes effective.
Exchange Online PowerShell Module V1 (EXO V1) or Exchange Online PowerShell Module V2 (EXO V2) installed on the machine being used
Exchange Online PowerShell Module v1 (EXO V1) does not support Multi-Factor Authentication (MFA). So, if the account that you are using for performing the action has MFA enabled, consider using Exchange Online PowerShell Module v2 (EXO V2).
How to check which Exchange Online PowerShell version is installed?
- EXO V1 does not require any installation. All you need to do is connect and import the module using PowerShell commands (commands discussed later).
- Since EXO V2 requires an installation, it is always a good practice to check if the required module is installed or not using the below command:
- Get-Module -ListAvailable -Name *Exch*
- If EXO V2 module is installed, check what version is currently installed, you can run the below command:
- Import-Module ExchangeOnlineManagement; Get-Module ExchangeOnlineManagement
At the time of writing this content, latest version of EXO V2 module was 2.0.4. You can refer to the Release Notes section of this article to get the version of Current Release:
About the Exchange Online PowerShell V2 module | Microsoft Docs
How to install
As stated above, only Exchange Online PowerShell version v.2 (EXO V2) requires installation, to install the EXO V2 module for the first time, complete the following steps
- Install or update the PowerShellGet module as described in Installing PowerShellGet.
- Close and re-open the Windows PowerShell window
- Now you can use the Install-Module cmdlet to install the EXO V2 module from the PowerShell Gallery:
- In an elevated PowerShell window (all users):
- Install-Module -Name ExchangeOnlineManagement
- When you are finished, enter Y to accept the license agreement.
How to update
If the module is already installed on your computer, you can run the command we shared above to see the version that is currently installed and update it to the latest version using the below command:
- Update-Module -Name ExchangeOnlineManagement
How to uninstall
To uninstall the module, run one of the below command (in an elevated PowerShell window)
- Uninstall-Module -Name ExchangeOnlineManagement
List of users in .csv format
- Ensure the CSV file is in the same folder where you run this PowerShell script from
- Below is the sample for CSV file:
Getting detailed migration report
Now that you have clarity on whether you are using EXOV1 or EXO V2 PowerShell Module, it should be easy for you to decide which path to follow.
EXO PowerShell V1 execution process
Before you run the script, please ensure you have met all the pre-requisites so that you get the desired outcome. After you confirm having met all the pre-requisites, copy and save the below script in your favourite script editor and save it as a GetMigrationReport.ps1 file ensuring that the script and the CSV File are saved in the same location.
Don’t forget to create a blank folder named Reports at the same location. This is where all the reports will be saved.
#Make sure the csv file is in the same folder where you run this PowerShell from
#Connect to Exchange Online PowerShell
Set-ExecutionPolicy RemoteSigned
$UserCredential = Get-Credential
$Session = New-PSSession -ConfigurationName Microsoft.Exchange -ConnectionUri https://outlook.office365.com/powershell-liveid/ -Credential $UserCredential -Authentication Basic -AllowRedirection
Import-PSSession $Session -DisableNameChecking -AllowClobber
#Change this to path of the csv file that contains EmailAddress of all User Mailboxes you want to get a report for
$List = import-csv ".MigrationReportUsers.csv"
#Loop through each row in csv
ForEach ($User in $List)
{
$UserID = $User.EmailAddress
$mailbox = Get-MigrationUserStatistics -Identity $UserID -IncludeReport
$mailbox.Report.Entries | FT -Property CreationTime,ServerName,Type,TypeInt,Flags,FlagsInt,Message -Wrap -AutoSize | Out-String -Width 50000 | Out-File .Reports"$UserID.txt" -Encoding UTF8
}
Remove-PSSession
- Launch Windows PowerShell (in elevated mode)
- Change the path to the location where you saved the .ps1 file
- Run the below command:
- Navigate to the reports folder and you will notice that text files start appearing in this folder.
- The report for each mailbox will be saved as the user’s UPN and in .txt format
EXO PowerShell V2 execution process
Before you run the script, please ensure you have met all the pre-requisites so that you get the desired outcome. After you confirm having met all the pre-requisites, copy and save the below script in your favourite script editor and save it as a GetMigrationReport.ps1 file ensuring that the script and the CSV File are saved in the same location.
Don’t forget to create a blank folder named Reports at the same location. This is where all the reports will be saved.
#Import Exchange Online PowerShell Module
Import-Module ExchangeOnlineManagement
#Connect to Exchange Online PowerShell
Connect-ExchangeOnline -UserPrincipalName
#<UPN> is your account in user principal name format
#Change this to path of the csv file that contains EmailAddress of all User Mailboxes you want to get a report for
$List = import-csv ".MigrationReportUsers.csv"
#Loop through each row in csv
ForEach ($User in $List)
{
$UserID = $User.EmailAddress
$mailbox = Get-MigrationUserStatistics -Identity $UserID -IncludeReport
$mailbox.Report.Entries | FT -Property CreationTime,ServerName,Type,TypeInt,Flags,FlagsInt,Message -Wrap -AutoSize | Out-String -Width 50000 | Out-File .Reports"$UserID.txt" -Encoding UTF8
}
Remove-PSSession
- Launch Windows PowerShell (in elevated mode)
- Change the path to the location where you saved the .ps1 file
- Run the below command:
- Navigate to the reports folder and you will notice that text files start appearing in this folder.
- The report for each mailbox will be saved as the user’s UPN and in .txt format
Checking Migration Progress status
You can check migration status for a single mailbox using this command:
• Get-MigrationUserStatistics -Identity
You can check migration status for a single batch using this command:
• Get-MigrationUser -BatchId | Get-MigrationUserStatistics
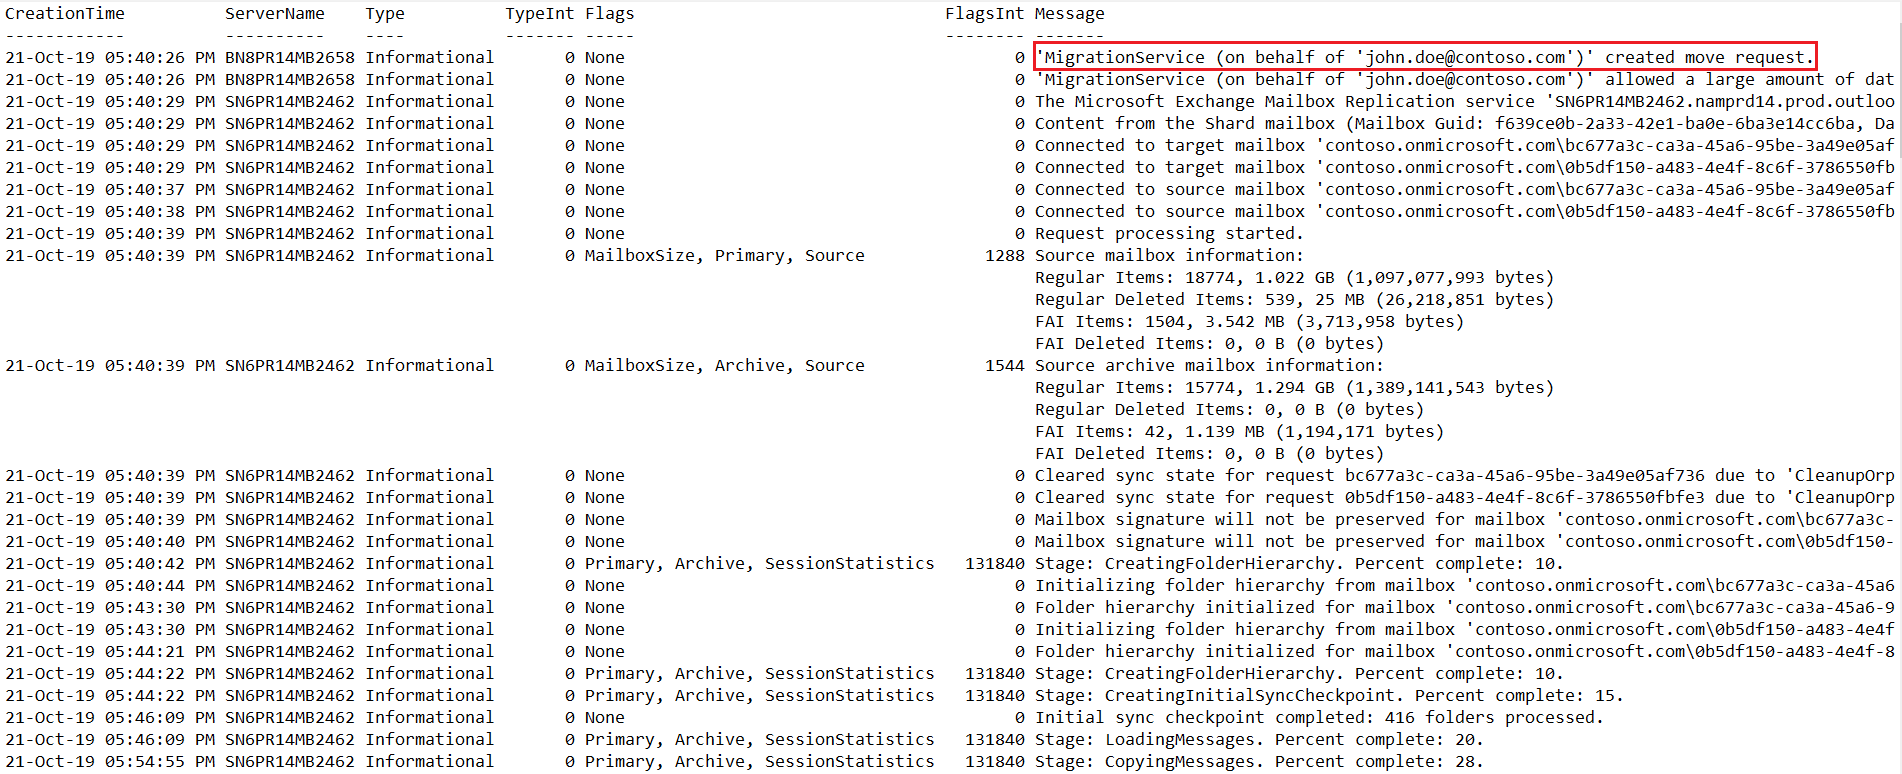
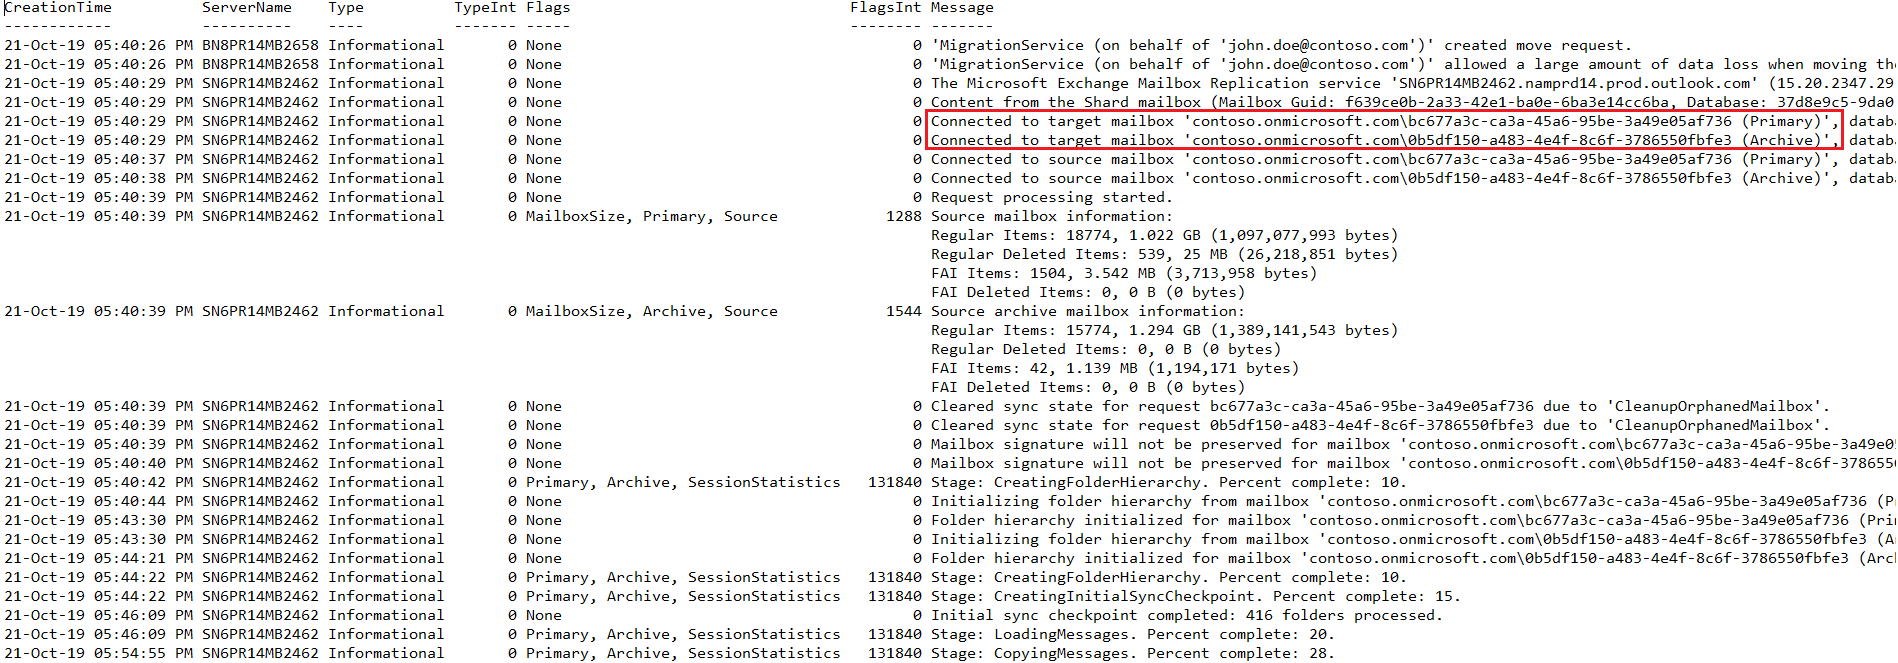
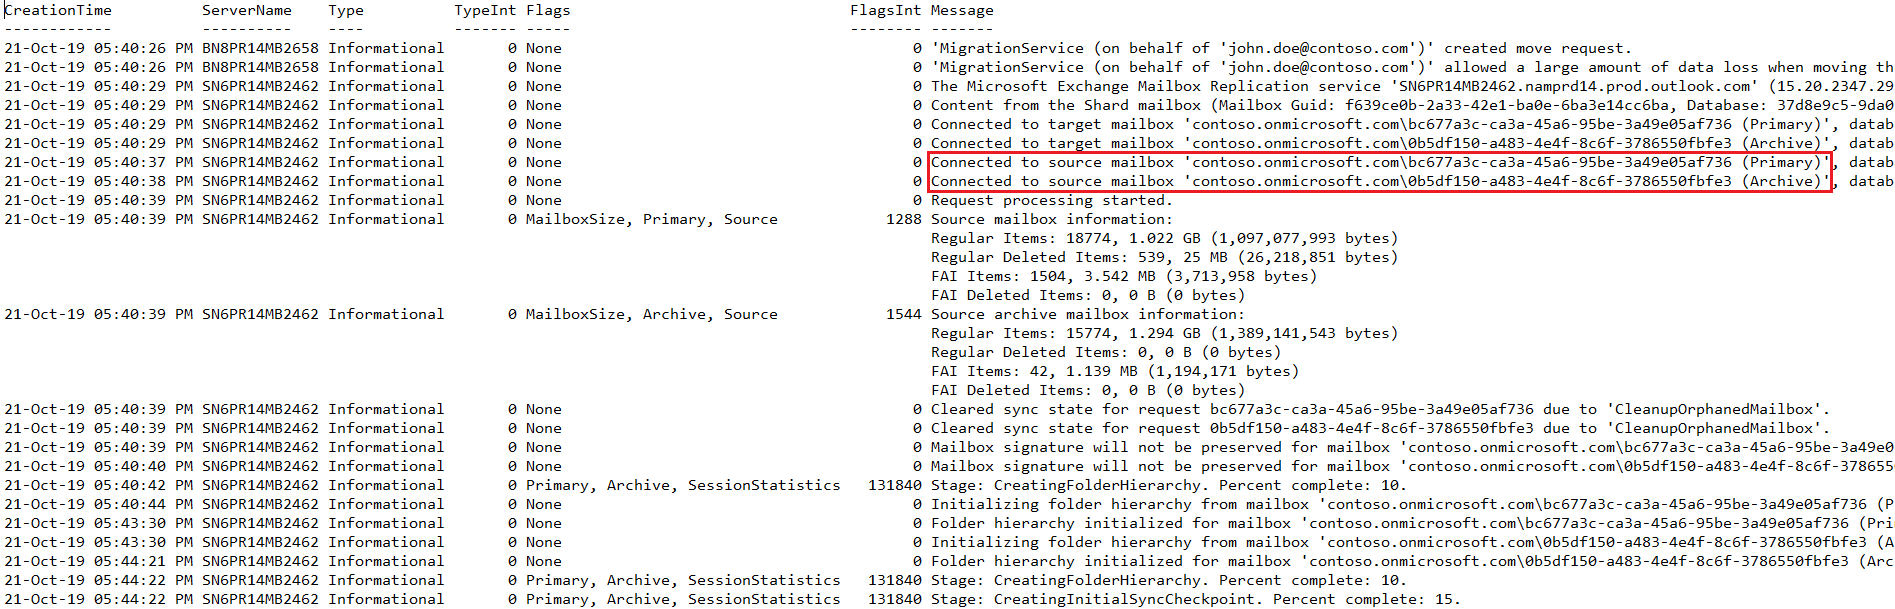
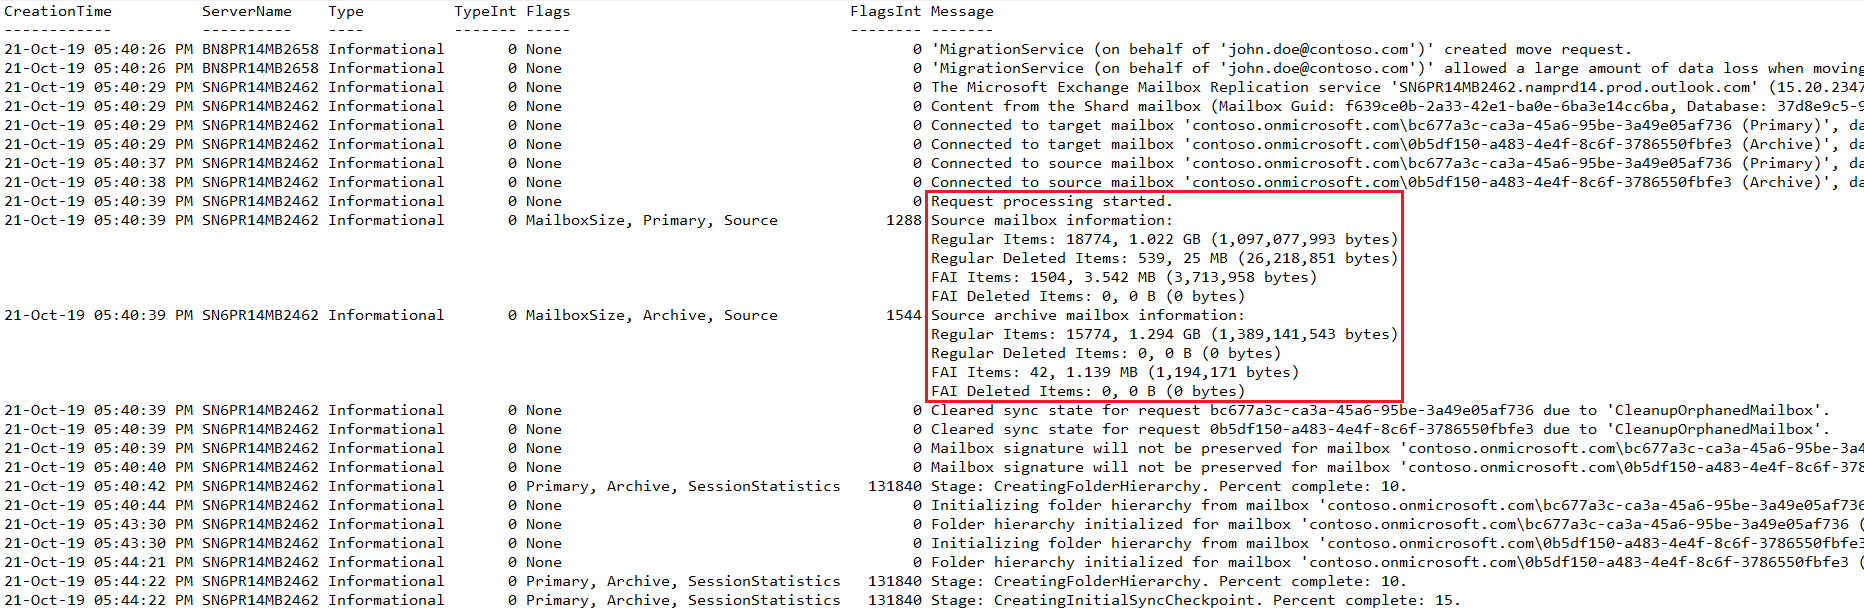
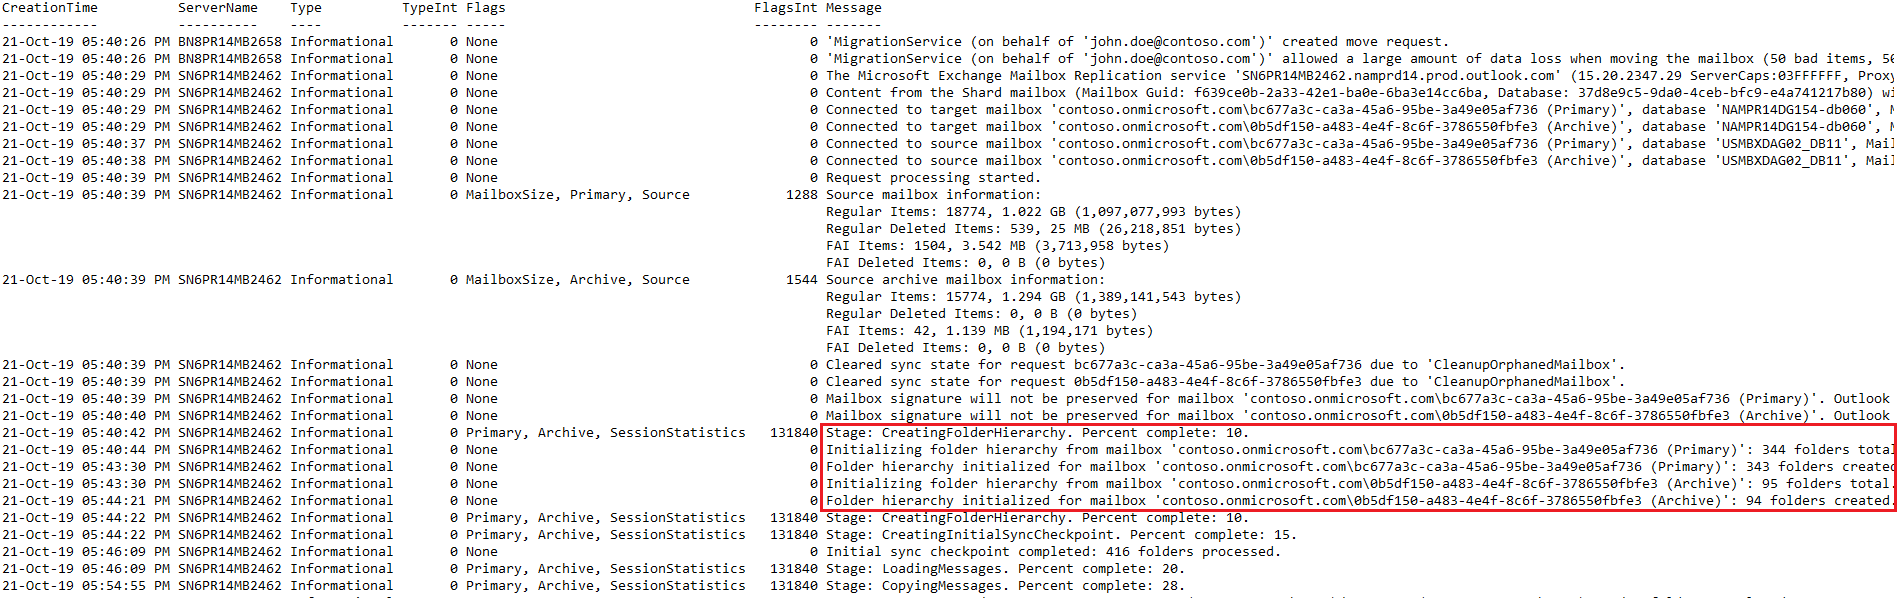
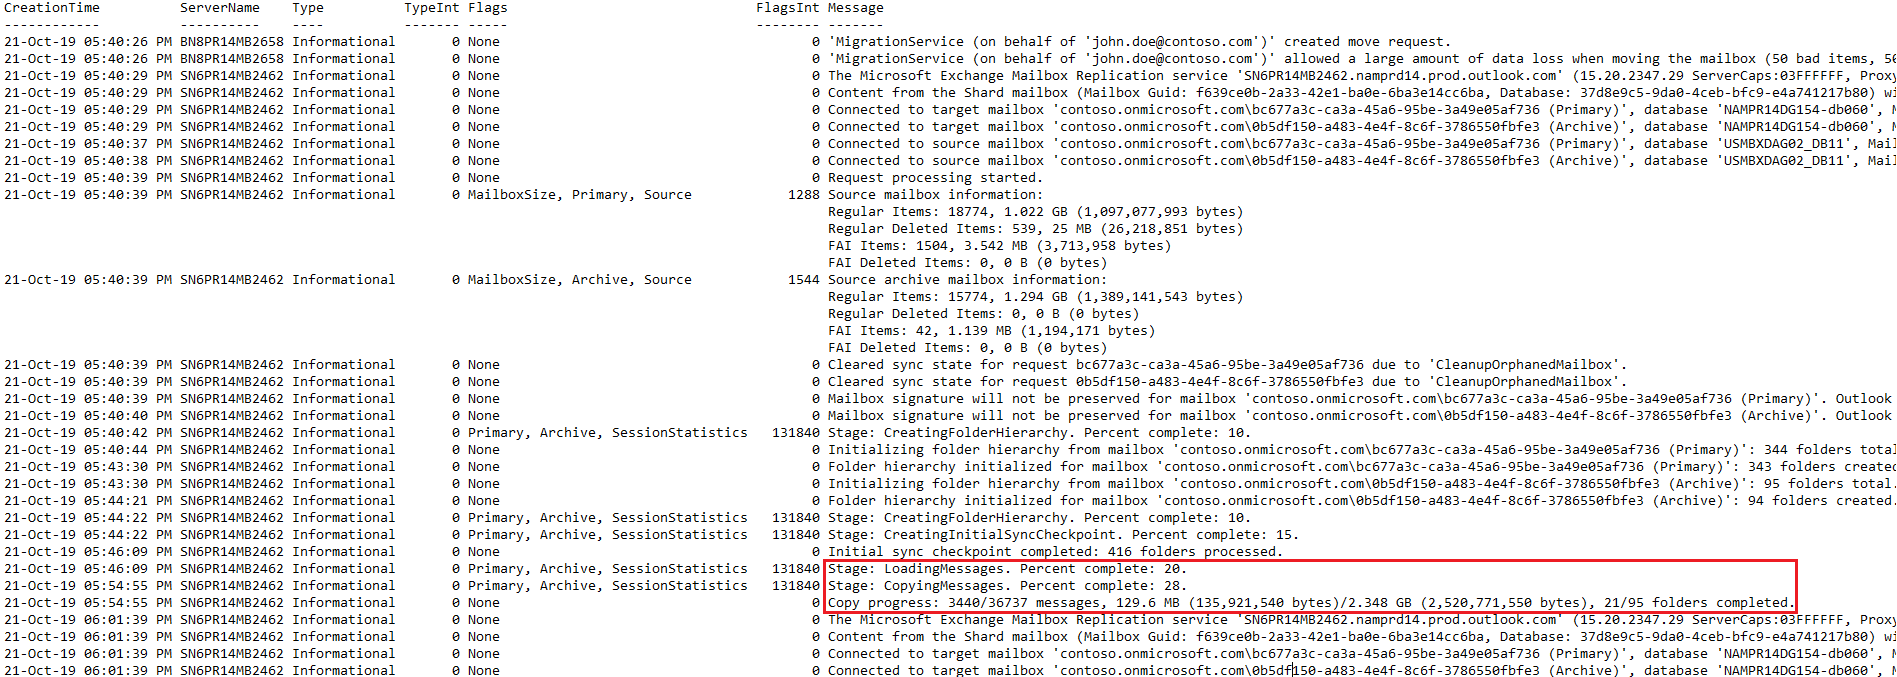
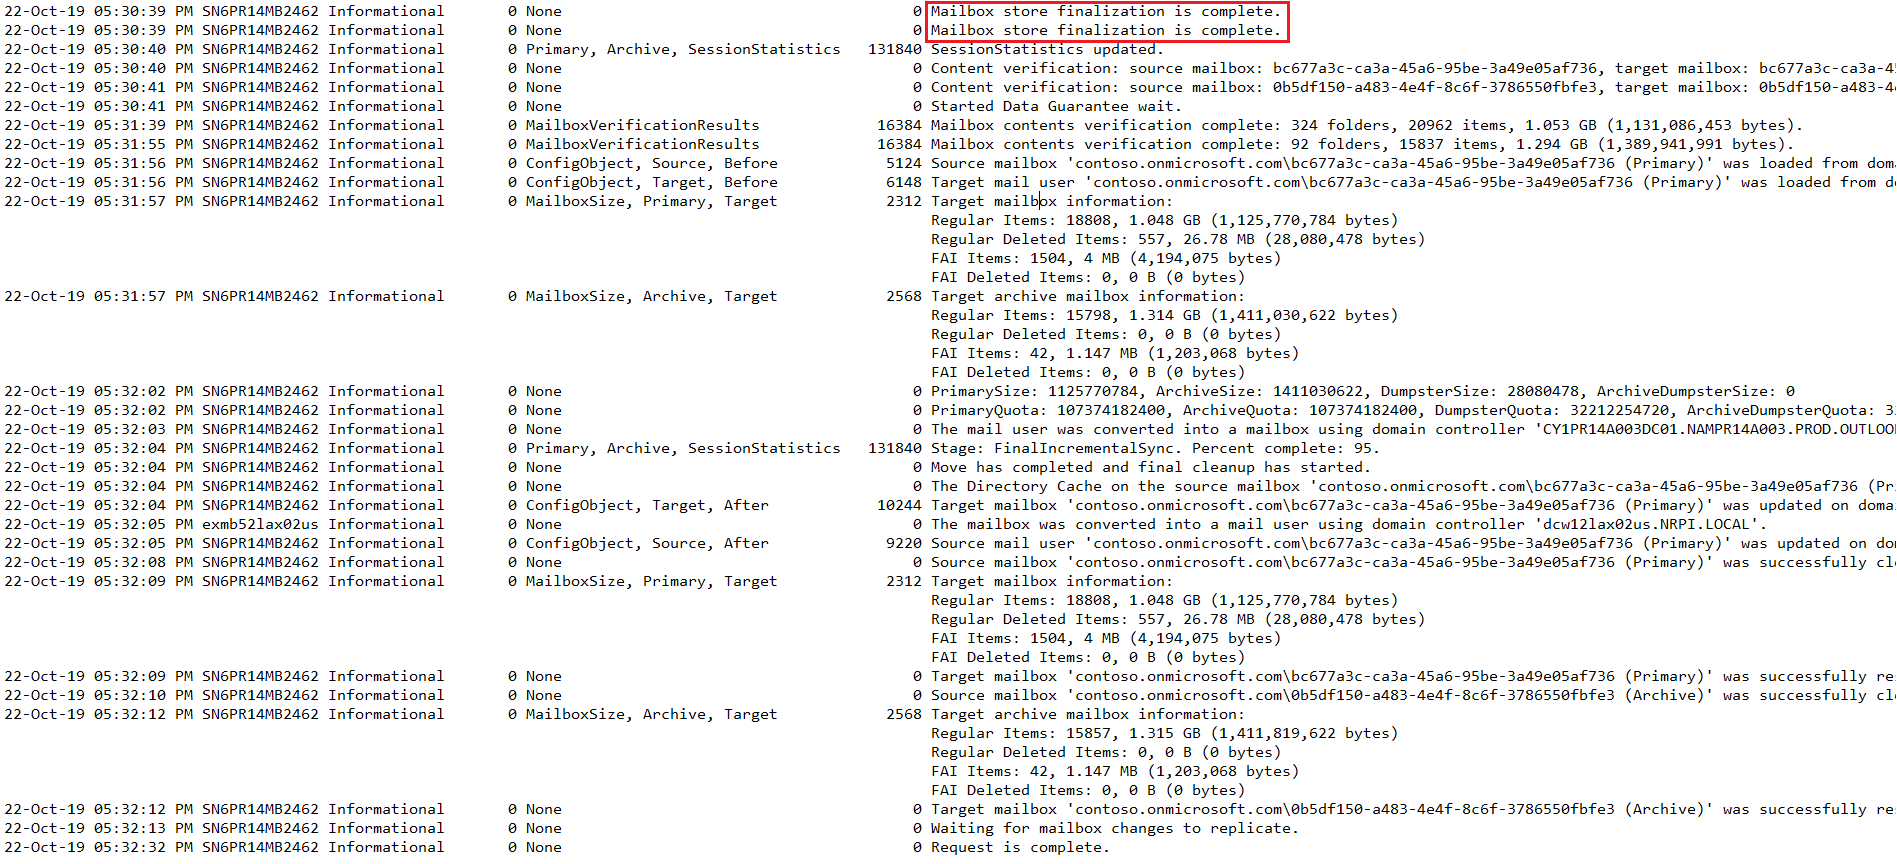
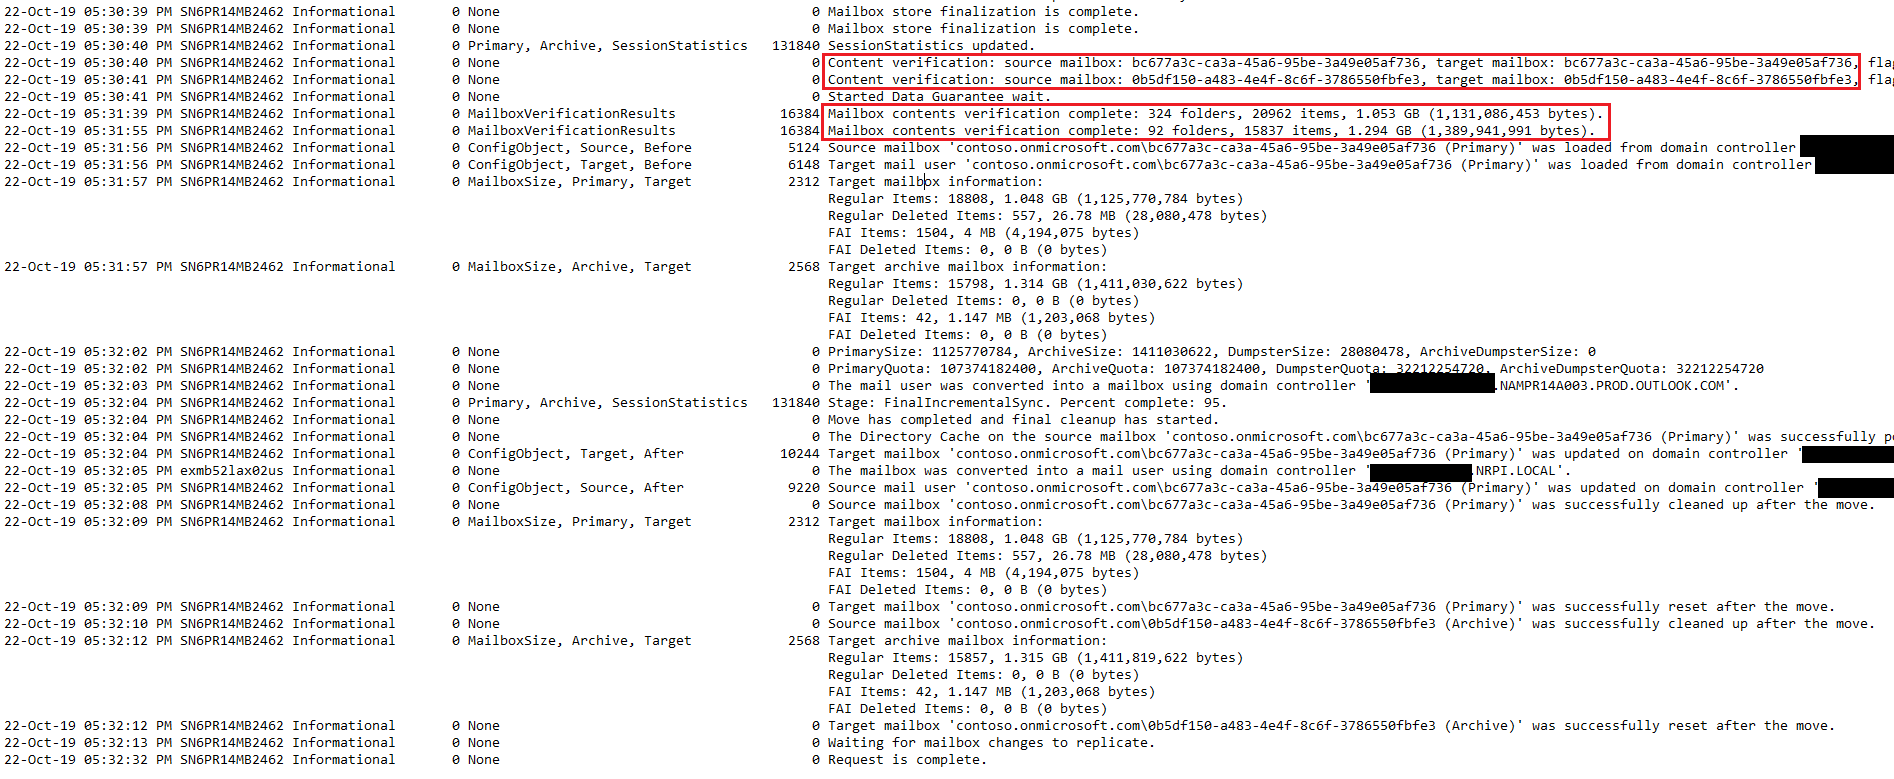
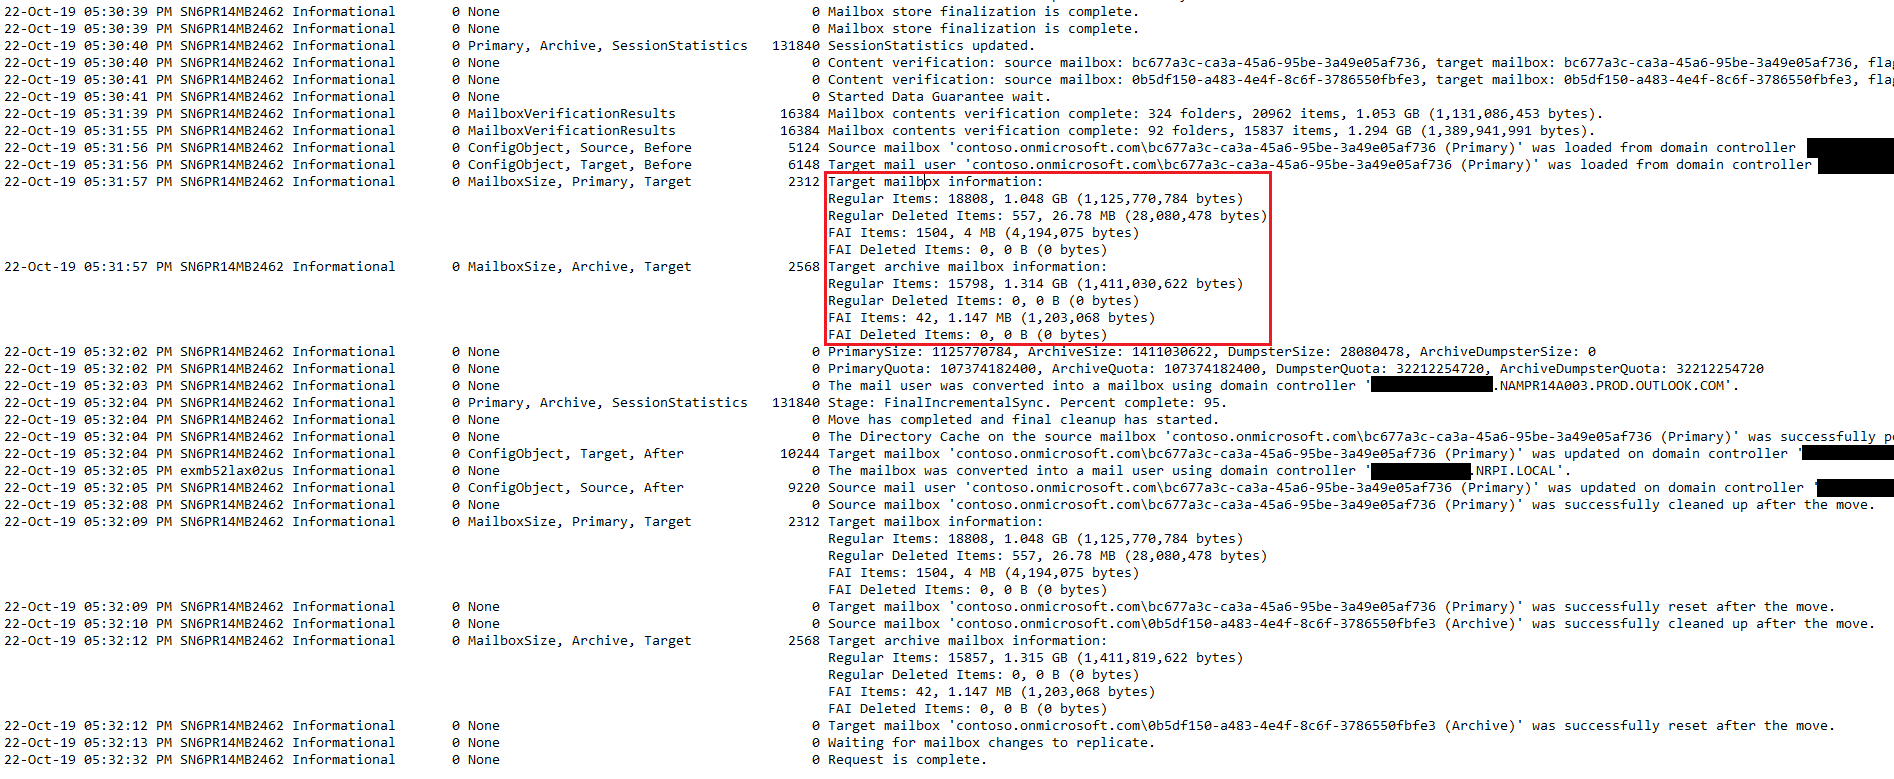
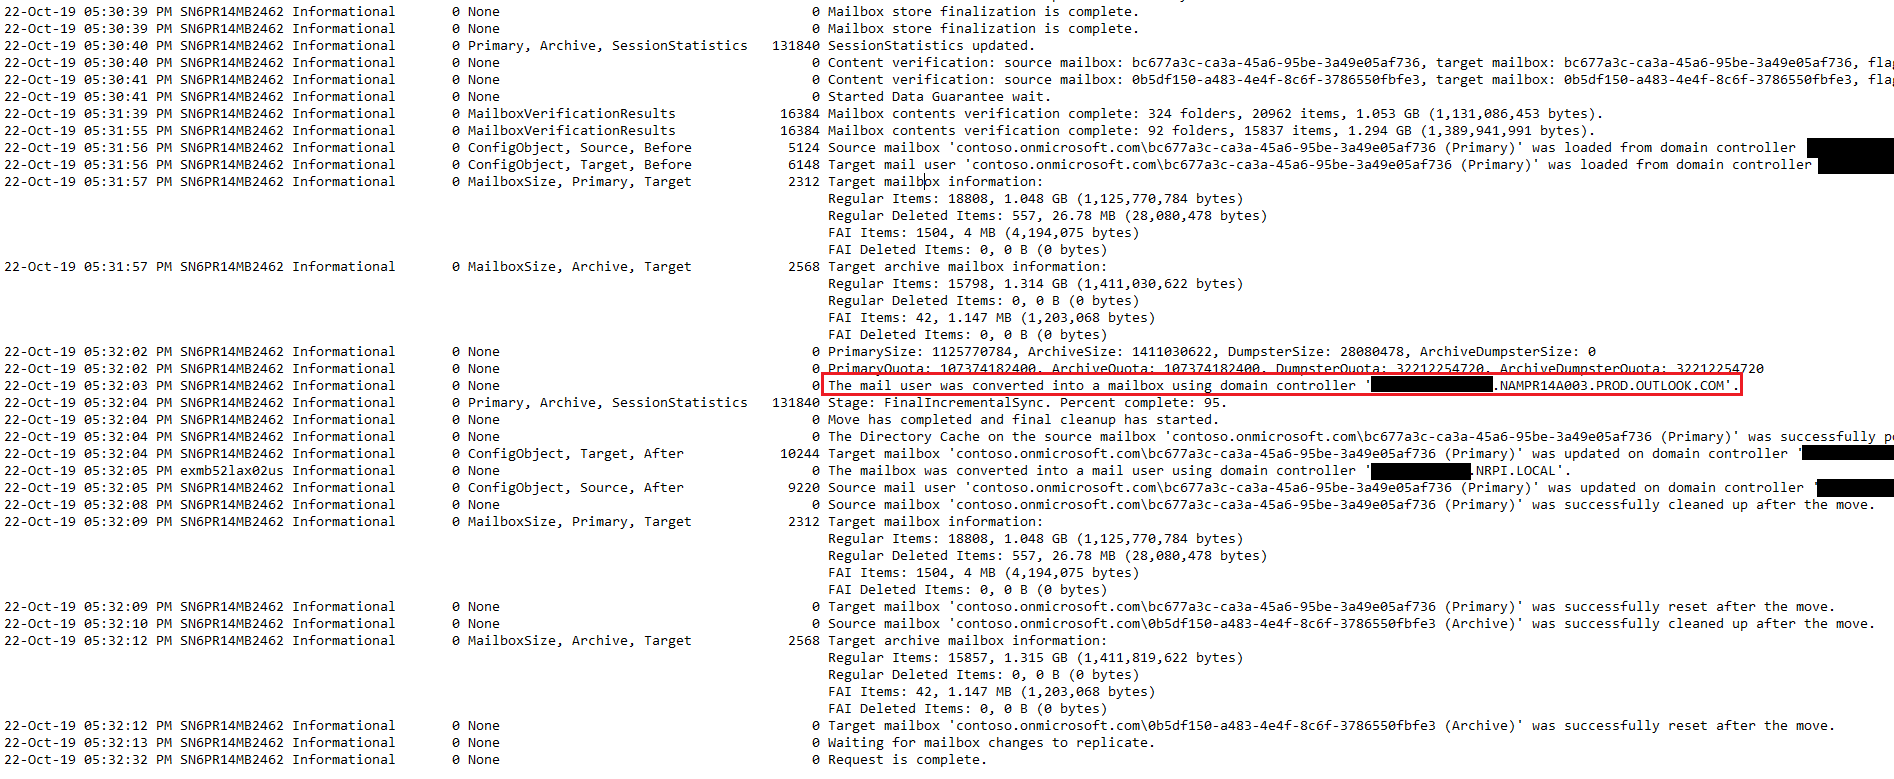
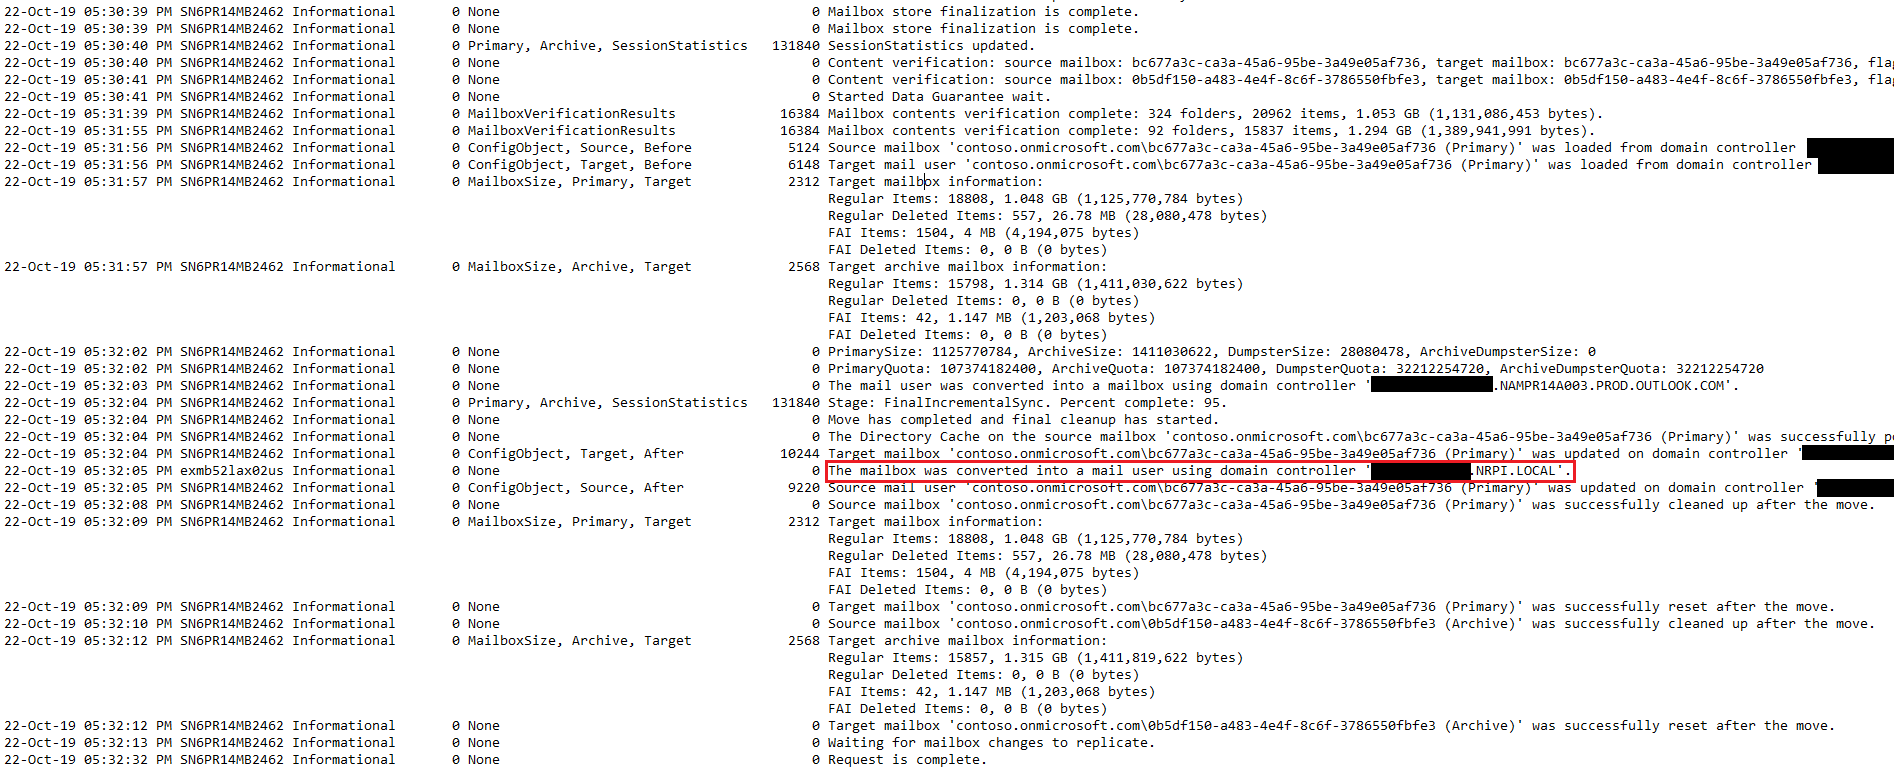
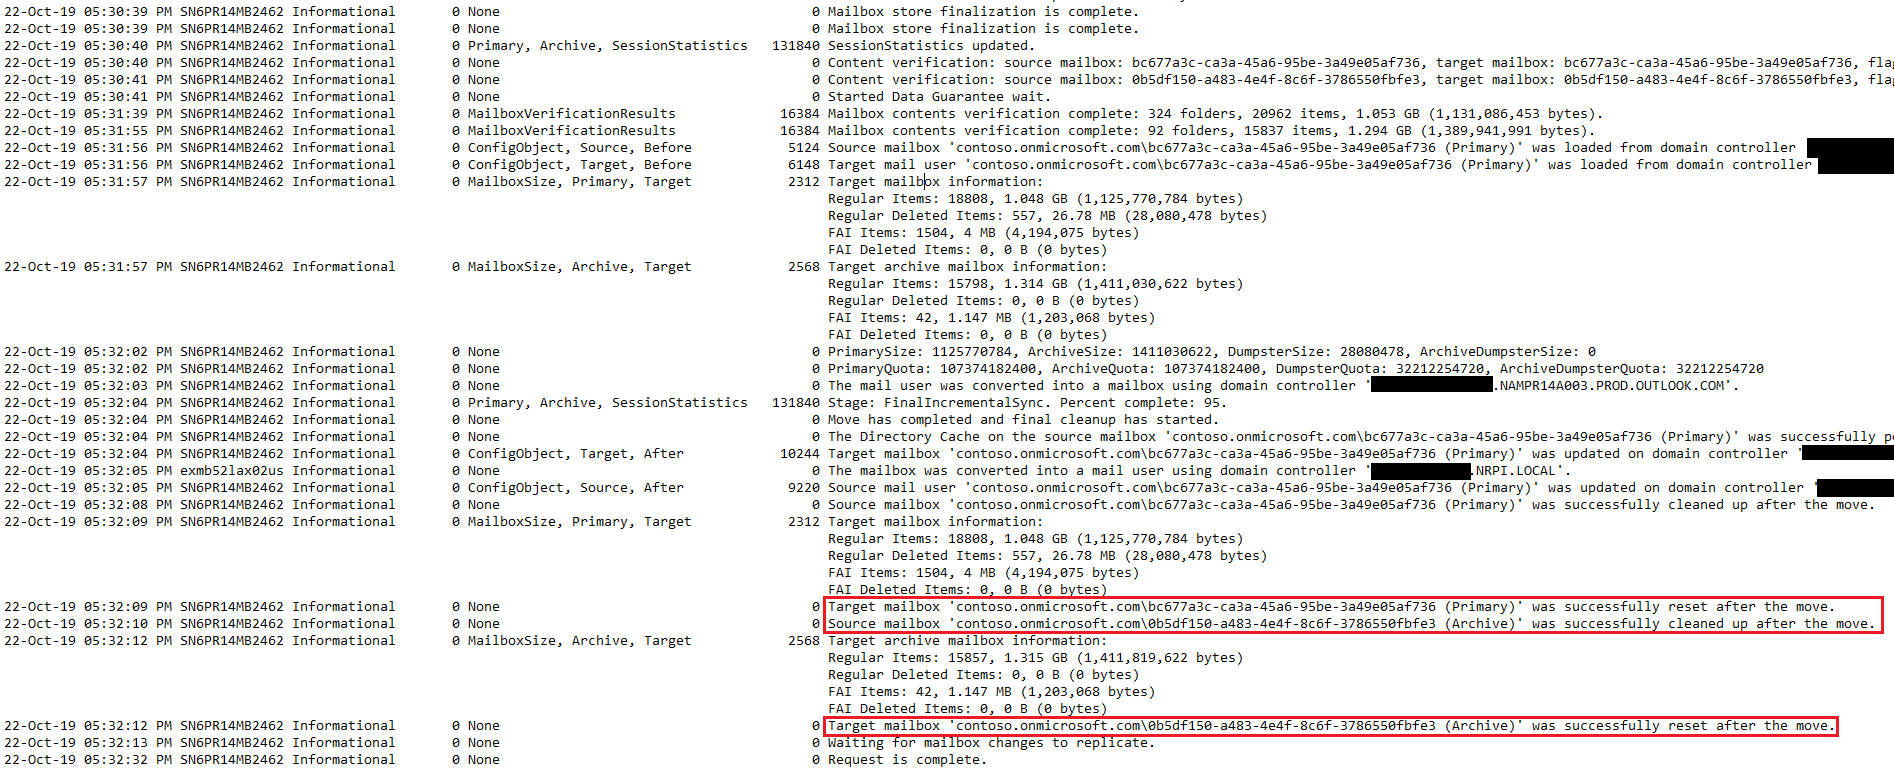
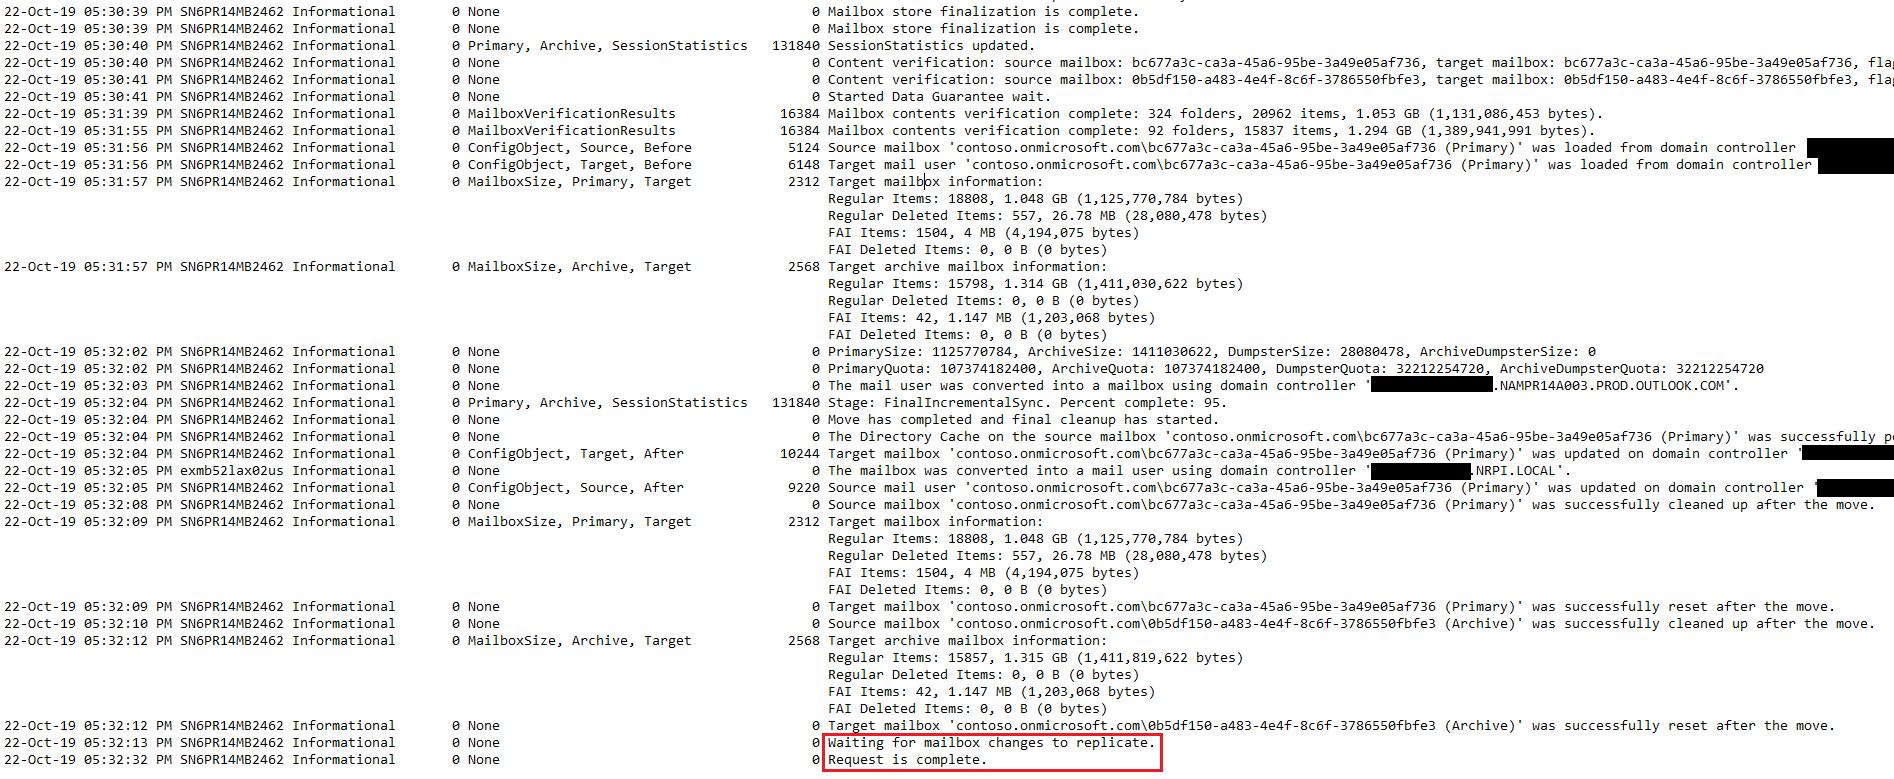
Understanding the report
- We can customize this report as per our requirements. In this example, we are extracting the Creation Time, Server Name, Type, TypeInt, Flags, FlagsInt, Message columns and also using the AutoSize switch to make the report look neat and tidy.
- The report begins the details of the user who created the migration batch.


That’s good to know, awesome work bro 👍
Thank You SeSel 🙂